
Hello, dear readers! "Dreams of an Architect" are back with a new architectural drawing today. Approaching the same style that you have already accustomed to, as far as my works are concerned, this hiperrealistic pencil drawing was made as a gift for a friend who is also going to become an architect, just like myself.
You might wonder why I made this particular choice... Firstly, London is an international icon for its architecture - and the Tower Bridge is one of those masterpieces that make the English capital stand out. Both symbolic and inspirational, this bridge was built between 1886 and 1894. Situated near the Tower of London, its architecture was adapted to fit in with the local architectural landscape, despite the modern structure.
Tower Bridge is considered one of the most beautiful bridges in the world. Undoubtedly, this architectural jewel, reflecting on the deep waters of river Thames and having one of the world's greatest cities in background is more than worth making the subject of a hyperrealistic drawing.
I should start by mentioning a few general aspects related to the drawing - this one is an A3 size piece for which I used 0.7 mm HB pencil and a fine eraser for adding highlights. Further on, there are all the steps in the drawing process, described above each picture. Enjoy the evolution!
1) The necessity for an initial sketch is generally encountered for any drawing, but, when it comes to architectural drawing, it is particularly important for drawing a correct perspective. While the portraits are strictly based on imitation, building drawings are perceived in a different way, according to certain drawing rules. Usually, every architectural perspective starts by establishing a horizon line and the focal points, depending on the subject chosen.

2) As far as the initial sketch is concerned, its aim is to provide the outline of the drawing and to give you a general idea of the final layout, so there's no need to include the tiny details in it - the second stage is going to make up for that. Correct shading is vital for giving that realistic sense of depth. When drawing an aerial perspective, the grey shades vary on a large scale - this can be achieved by using different pencils (usually, from HB to 6B).

3) Remember: you should keep a piece of paper between your hand and the drawing surface, otherwise it can all get messy, especially if you use charcoal.
Usual architectural drawings focus only on one building or complex of buildings, so the surroundings and the background are more sketchy. This certainly is an advantage, because the accent there is to be put on the technical aspects, with no need for exquisite details. On the other hand, in hyperrealism, the level of detail stays the same in every area of the drawing. The style is up to the artist's choice, as a form of individual expression, but it should be adapted according to the purpose of each drawing.

4)When you have to shade in large surfaces (especially the sky), using a cotton pad to smudge the pencil would save you a lot of time and effort. Make circular moves and be careful not to leave any marks on the drawing surface. Also, avoid smudging the already-drawn surfaces, otherwise the details may fade or even disappear. For highlights, you can use a thin eraser.


5)There is no certain succession of the elements during the drawing process - I usually start from right to left, but this does not really matters. It is more convenient to start with the principal elements (usually the ones that cover the largest surface), only then going on with the others. A good initial sketch will allow you to shade in correctly.
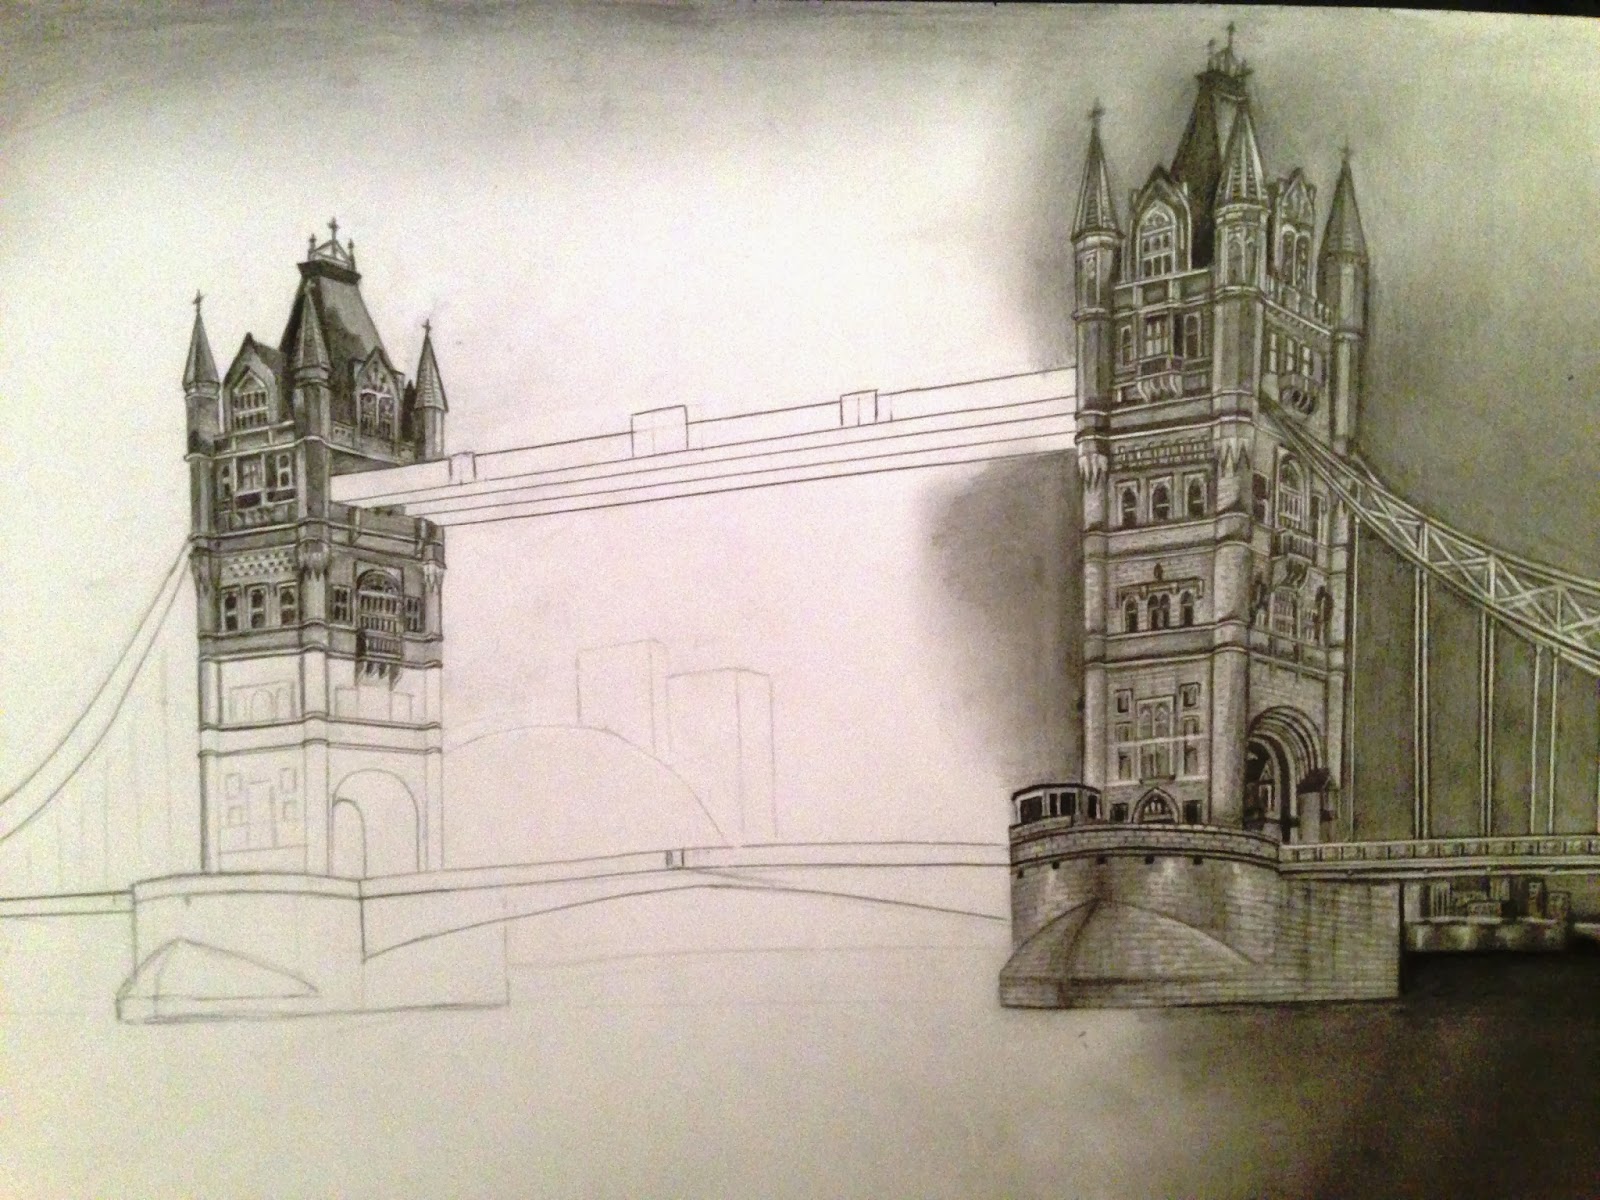


6) Inevitably, some of the details, especially the highlights, will lose their intensity until the end of the drawing process, therefore it is better to focus on them only at the end.


There is the finished version of the drawing, followed by some detail pics. I hope this artwork lived up to your expectations and you found these drawing tips useful! Should you have any questions related to this drawing or my drawing techniques in general, do not hesitate to leave a comment below.
Do you have any suggestion for upcoming articles? Let me know and don't forget to check 'Dreams of an Architect', your daily source of artistic inspiration!
Minunat desenul!
ReplyDeleteNu am inteles prea bine cum fac fundalul mai rapid. As vrea sa stiu mai multe modalitati.Multumesc anticipat! :*
In functie de complexitatea desenului, fundalul poate fi mai elaborat-un cer innorat (vezi "Westminster Palace-drawing") sau perfect uniform ("Taj Mahal - pencil drawing")
ReplyDeleteAlegerea unui anumit tip de fundal depinde de tipul de cladire si de incadrarea acesteia in tablou; de asemenea, de gradul de focalizare pe care artistul il doreste asupra ansamblului arhitectural.
Pentru acest desen, fundalul este de o complexitate medie. Podul in sine este destul de complex si cuprinzator in detalii, de aceea alegerea unui fundal incarcat ar fi distras atentia de la subiect. In acelasi timp, fundalul contine accente: lumina amurgului patrunde printre norii specifici atmosferei londoneze fara a marca un contrast puternic. In acest caz, datorita structurii delicate a podului care ocupa efectiv o mica parte din plansa, un fundal perfect uniform ar fi afectat echilibrul compozitiei pe axa verticala.
Am mentionat aspectele de mai sus pentru a scoate in evidenta importanta alegerii unui fundal potrivit - element al desenului deseori neglijat. Desigur, diferite stiluri de desen abordeaza diferit fundalul. Cazul prezentat mai sus vizeaza stilul hiperrealist si pictural, insa desenul obisnuit de arhitectura abordeaza un fundal mai mult grafic.
Revenind la tehnica, recomandarea mea este, pentru mai multa eficienta, hasurarea suprafetei cu un creion moale (4B-6B, avand grija sa hasuram in aceeasi directie), apoi uniformizarea hasurii cu o discheta din bumbac sau alt material care sa nu lase urme (prin miscari circulare sau liniare, in functie de caz). Contactul suprafetei hasurate cu mana este de evidat, pentru ca pot aparea urme inestetice. Tehnica aceasta este utila si pentru obtinerea degrade-urilor si este esentiala in cazul in care avem de hasurat cat mai fin suprafete mari.
I've been drawing bridges since grade school, and I must say your work is incredibly good - some of the best I've seen online. I was wondering how long it takes you to do a drawing with so much detail?
ReplyDeleteThanks, and Good luck with your career
WDAJ