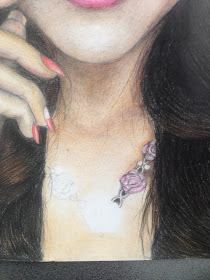
Dear readers, welcome back to a new art piece! Our subject today is the amazingly beautiful and inspirational Carli Bybel. This 22-year-old makeup artist and fashion blogger not only has a doll appearance that most of today's girls would wish for, but she also promotes inner beauty as an essential part of our life and personality.
Definitely, Carli is a remarkable person - find out more about herself, fashion, makeup, beauty and others on her blog http://www.thebeautybybel.com/!!
As you are already used to, if you've had a look on my blog regularly, there comes up the evolution of the artwork, but today I am going to give extra advice and tips for how to draw a hyperrealistic pencil portrait. Hope you'll enjoy it and let me know what you think about my work <3
-- General details --
Size: A4 (usual copy paper)
Tools: coloured pencils (Staedtler), black ballpoint pen, HB, 2B and 10B black pencils
Time spent on this piece - 16 hours
I should also mention that I am completely self-taught, so the tips below are from my own experience :)
Tip #1 - first sketch
Everything starts with a fine sketch of the main features - facial shape, eyes, nose, lips; this way you can make an idea of how it will look on the page. Even if making a good sketch right from the start will help you a lot later on, it doesn't necessarily have to be a perfect contour - you'll erase it anyway, once you go on with the drawing. So make sure your guide lines are not too pronounced - they are not meant to be part of your drawing, you should be able to erase them easily.

Tip #2 - Eyes first!
Eyes are the most expressive of our features, and, therefore, they are frequently considered to be the hardest part of the drawing. The reflections and the fine details in the iris are more difficult to achieve, so my advice would be to do some practice first, a few sketches, only then try using a reference photo and insisting on details. A single wrong-drawn reflection in the eyes can spoil the whole appearance of the drawing, so make sure you first sketch the eye in pencil, don't get directly to coloured pencils, which are hard to erase in case you make a mistake. Take this tip into account, especially if you are a begginer or not so well accustomed to shapes and light contrast!
Tip #3 - All about shadows
A black and white drawing uses gradually darker shades of grey in order to create the illusion of a tridimensional object, while the coloured pencil technique is more complicated - it combines different colours. In my drawing, I used 8 colours only for the eyelids and the makeup illusion: beige, brown, red, orange, yellow, black, grey and white.
Drawing by nature is the best way to practice this colour mixing technique - take your time and notice properly how the colours come together. Then, try reproducing it yourself!
Tip #4 - The perfect hair
Weird or not, when it comes to a coloured pencil portrait, hair is by far the easiest element to draw. That's because it allows us to use different shades and colours and to create volume by combining them.
Tip #5 - Skin texture
In hyperrealism, every detail matters. The result you get by drawing is actually more accurate than a photography - so as even small pores and little hairs are visible. Adding skin texture asks for a lot of patience. Make sure you do not exaggerate, though - for example - the pores on the nose are the biggest, you don-t want to make them look like that all over the face.
This is the finished version of my drawing...
You can also find me on Instagram http://instagram.com/ely_monique# and on my Facebook page: https://www.facebook.com/architectureworldwide. For commissions, email me at moni.cirstea@gmail.com.
Hope you'll find my tips useful and please let me know if you wish to find out more :) I wish you all to have a great day and good luck with your drawing experience!! <3


No comments:
Post a Comment